Transactions
The Transactions tab (bottom bar: Activity) is your full spending log, grouped by day, newest first.
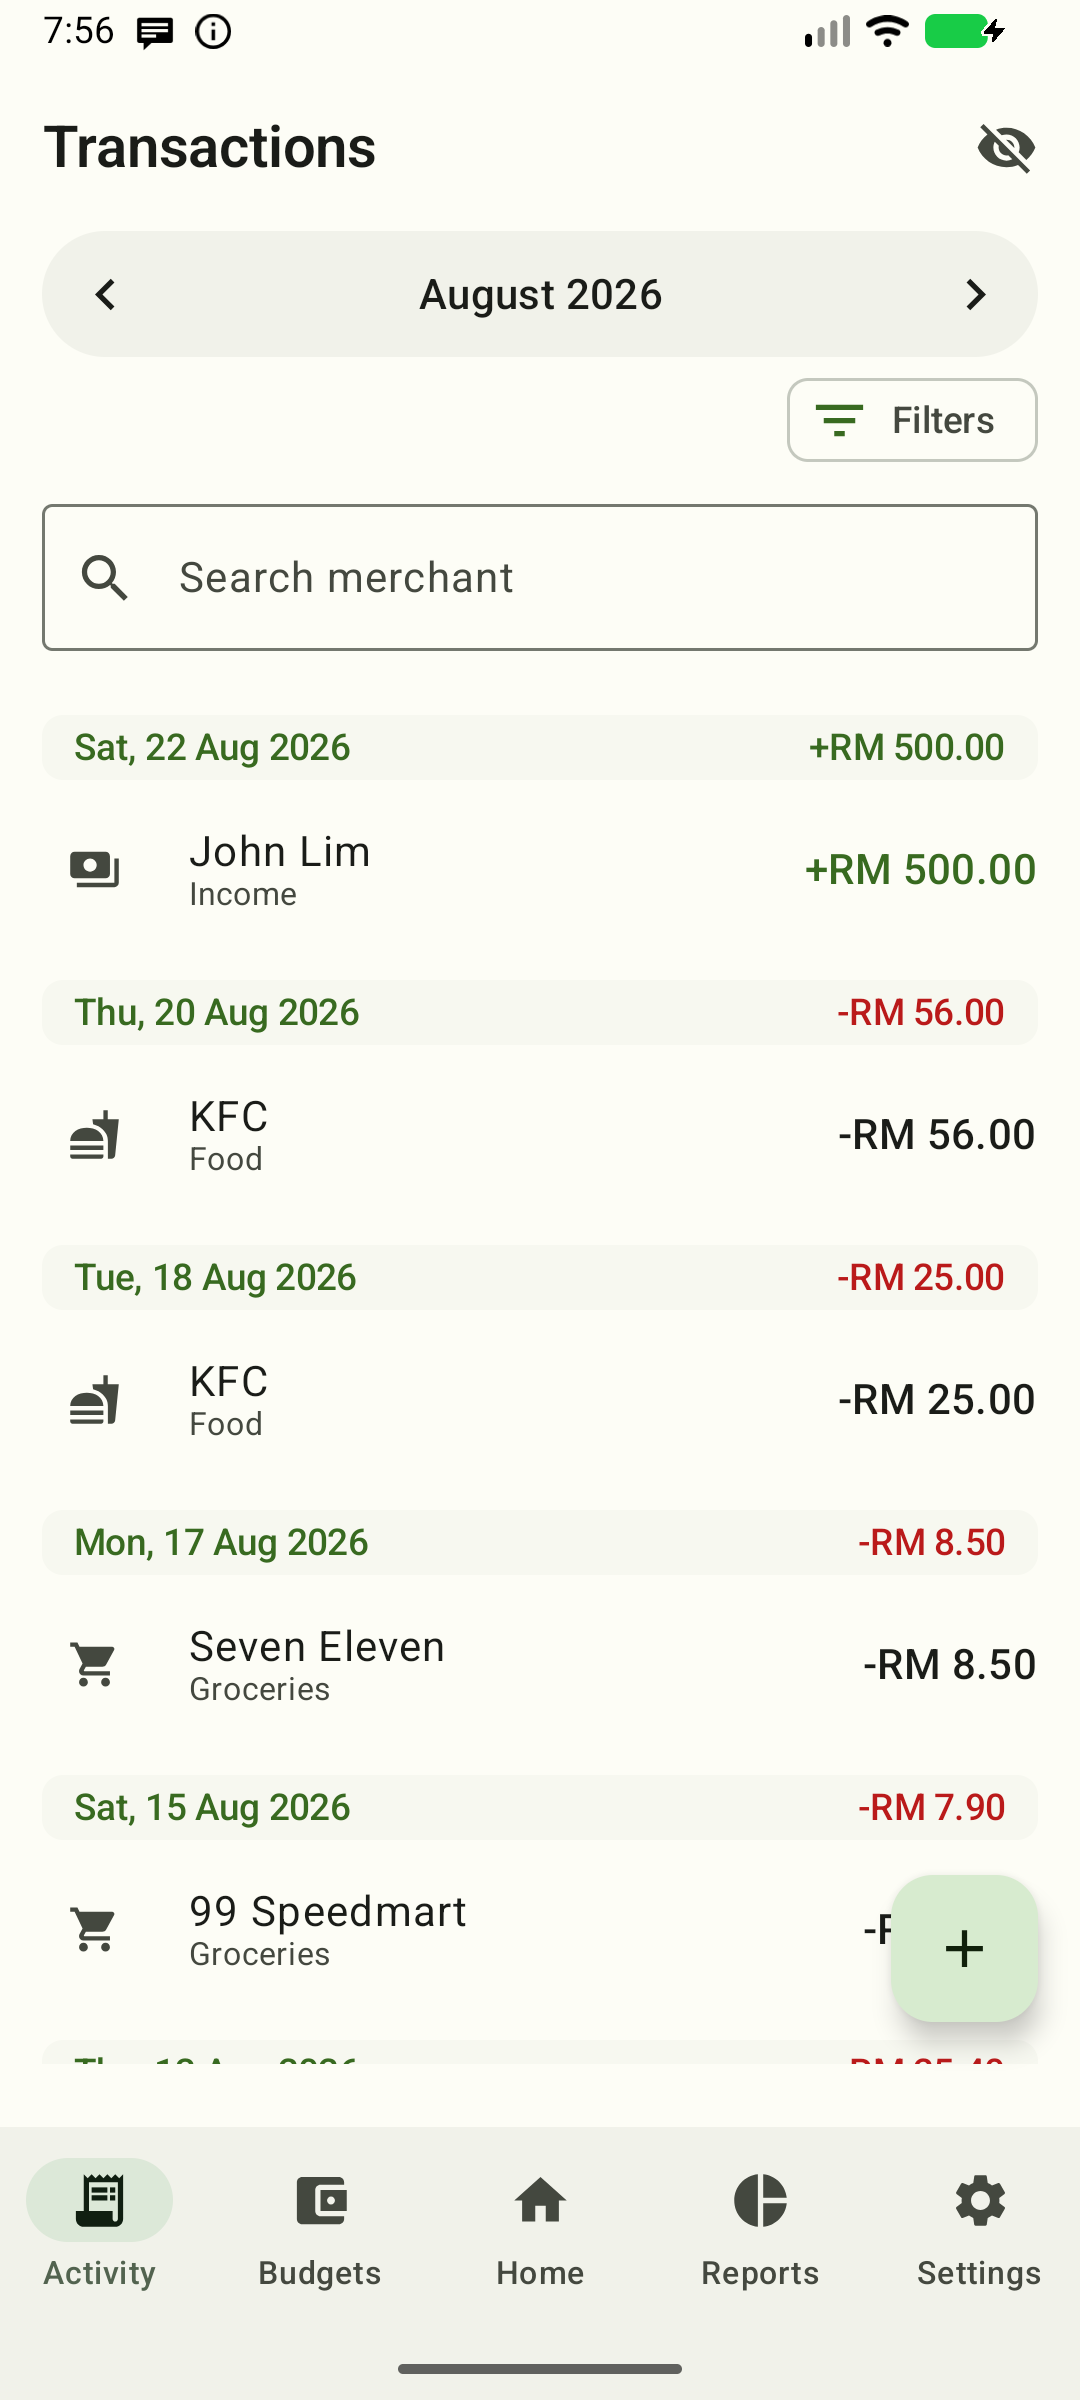
Month & filters
- Month selector —
‹/›arrows switch months. - Filters — tap the chip (shows Filters (n) when active) to open:
- Direction — All / Expenses / Income.
- Category — All categories, or a specific one.
- Search — type in the search field to filter by merchant or note.
The Activity tab can also be opened pre-filtered from Reports: "View transactions" on the snapshot card lands here scoped to that month, and with a donut slice selected it filters to that category too. Adjust or clear the filters afterwards as usual.
Rows
Each row shows the merchant, category (or source app), status chip for
non-completed transactions, and the signed amount (- expense, + income).
The date header above each day also shows that day's net total in your
main currency — in your theme's accent color when positive (income) and its
error color when negative (spending).
Tap a row to open the transaction editor.
Adding a transaction manually
Tap the + floating button to open the editor and fill in:
- Amount — required. Enter it normally (e.g.
25.40); minor units are handled for you. - Currency — choose from the supported currencies. Switching currency
re-renders the amount (e.g. RM
12.34→ JPY1234). - Date & time — when the transaction happened (date picker, then time picker).
- Merchant — optional.
- Direction — Expense / Income (chips).
- Category — choose one (list adapts to direction).
- Status — defaults to settled; choose Pending / Failed / Reversed if needed.
- Note — optional free text.
- Location — optional. See transaction-detail.md for the location picker.
- Items — optional line items; Attachments — optional files. Both are explained in transaction-detail.md.
Tap Save when done.
From the Quick Settings tile
Pull down Quick Settings, tap the pencil to edit the panel and pin Add transaction. Tapping the tile opens this same form from anywhere — if the device is locked it asks you to unlock first, and the app lock still applies.
Deleting a transaction
- In the editor: scroll down and tap Delete, then confirm in the dialog.
- In the list: swipe left on a row, then confirm in the dialog.
Hidden items
Transactions with status Pending, Failed, or Reversed are stored but hidden by default — they never count as real spending. Hiding also removes an item from view without deleting it.
- Toggle the eye icon in the top bar to show/hide hidden items.
- Rows that are hidden render faded.
- Swipe right a visible row to hide it; swipe right a hidden row to unhide it.
Delete vs hide
| Action | Result |
|---|---|
| Delete | Removes the transaction permanently (confirm dialog in both list and editor). |
| Hide | Keeps it, excludes it from views and totals until unhidden. |
Next
- Editing a transaction & attachments — fix details, split into items, attach files, add a receipt photo.