Activity
The Activity tab in the bottom bar is your full spending log, grouped by day, newest first.
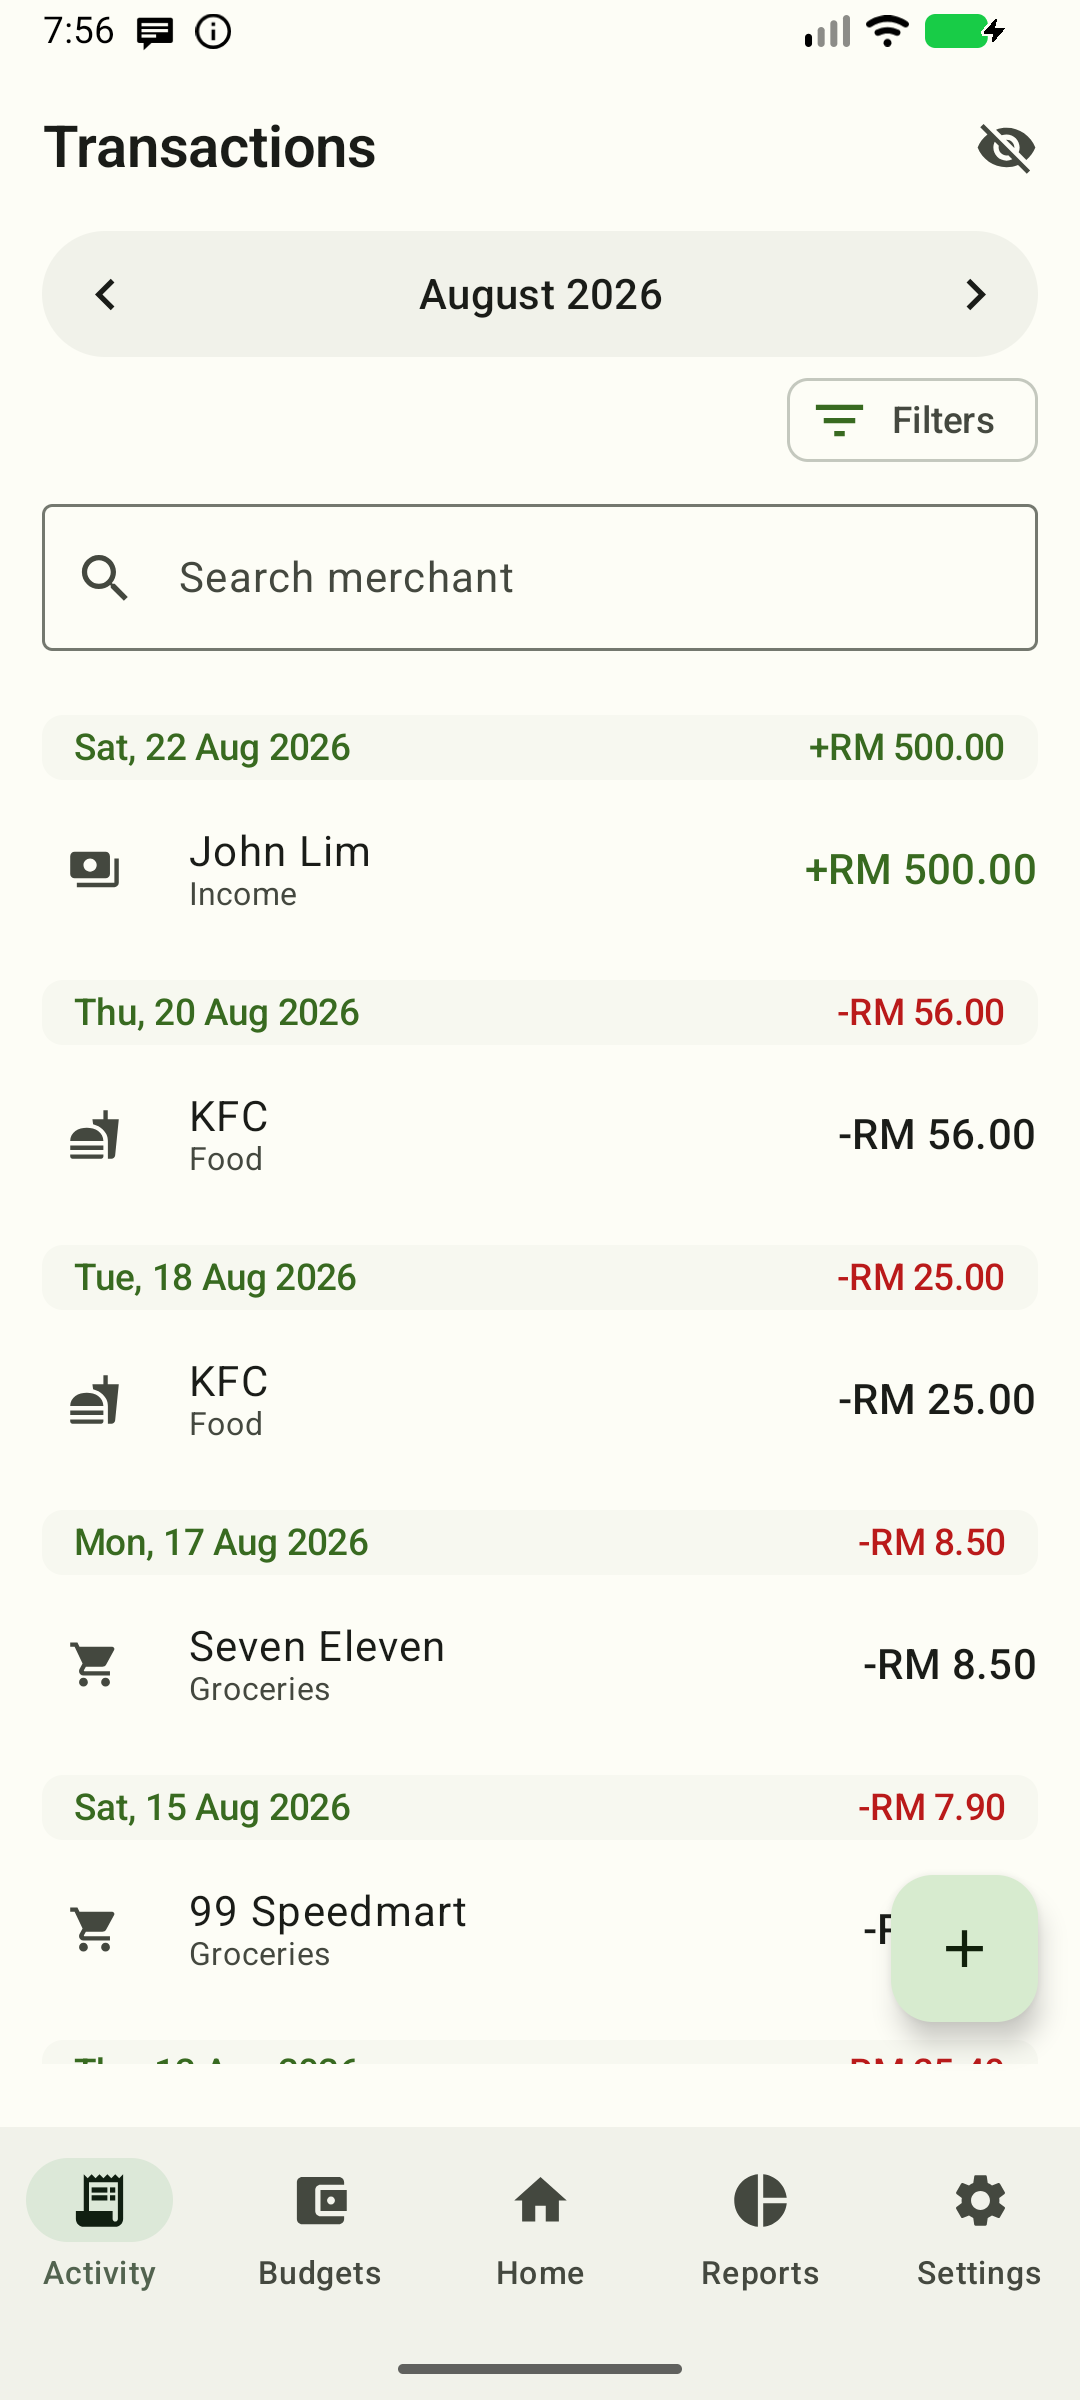
Month & filters
- Period row — the month selector and a single All history filter chip sit together at the top. The chip's swap icon and selected state show that it toggles the whole-ledger scope (it does not open a menu), and the pair wraps onto a second line at narrow widths or large text. Unselected means the selected month (default), which keeps search and filters inside that month; selected means All history, which searches the whole ledger, newest first.
- Month selector —
‹/›arrows switch months. In All history the month control steps aside while the All history chip stays selected, so each day header carries the year instead. - Filters — tap the filter icon in the app bar to open the filter sheet:
- Direction — All / Expenses / Income.
- Category — All categories, Uncategorised (transactions with no category), or a specific one.
- Show hidden transactions — reveal pending, failed and reversed rows.
- Search — collapsed by default. Tap the search icon in the app bar to open the compact single-line field below the summary; type to filter by merchant or note, tap its × to clear, and press Back or the close icon to collapse it. Its short Search hint keeps the control one line at large text, and screen readers announce the full "Search merchant or note" purpose. When the field is collapsed but a query is still active, a removable chip shows that query beside the filters, so an applied search is never invisible; opening the field hides the chip and shows the query in the field.
- Summary — one quiet line under the period row shows the visible row count and exact base-currency spend, or an honest unavailable marker.
Filters apply immediately and stay in place when you switch scope, so widening a search keeps what you typed. Active direction and category filters appear as removable chips with Clear filters; clearing filters keeps your search text. The sheet scrolls at large text sizes. Changing month fades the label and the month's list to the new month together. In All history, each day header also shows the year.
View all on Home opens the selected Home month with all categories and directions. Back returns to the same Home month. This separate view leaves the Activity tab’s own month and filters intact.
Transactions can also be opened pre-filtered from Reports: "View transactions" on the month insight card lands here scoped to that month, and with a donut slice selected it filters to that category too. Adjust or clear the filters afterwards as usual.
Rows
Each row leads with the merchant as its title, then the category (or source
app) as supporting text, a status chip for non-completed transactions, and the
signed amount (- expense, + income). The amount is always shown in full,
including its sign and currency: when the merchant and amount would collide,
the amount moves below the merchant with a small gap instead of being clipped
or shortened. Categories show as a 40 dp filled avatar — a tinted circle with
the category icon (or the merchant's initial) — so rows scan by category at a
glance.
The date header is a quiet divider, not a filled card: a short
weekday/day/month label in your device's date order and language (the year is
in the month selector, or added in All history) and that day's net total in
your main currency. A positive net is the
theme's one income accent; an ordinary expense net is neutral supporting text,
never error red. When a row leaves (hidden, unhidden or deleted) the list
animates it out and closes the gap; a day header leaves with its last row.
Day totals convert each row to your main currency with your exchange rates. A row without a rate is left out of the totals and called out in a footnote under the list; an amount too large to represent in your display currency is called out as outside the supported range instead, so the footnote never points you at exchange rates for a gap rates cannot fix.
Tap a row to open the transaction editor.
When the list is empty
Activity tells the empty cases apart:
- No matching transactions — the month has transactions, but your search or filters hid them all. Tap Reset filters to clear the search text and the direction and category filters together, or Search all history to widen the same search to the whole ledger; the scope, month and the show-hidden setting stay as they are.
- No matches in your history — All history is selected and none of your transactions match. Tap Reset filters, or switch back to Month.
- No transactions in this period — the month itself holds none. Tap Add transaction to record one by hand, or turn on notification access so bank alerts are captured automatically.
- No visible transactions in your history — All history is selected and nothing is visible in the whole ledger. Hidden transactions may still exist: turn on Show hidden transactions in the filter sheet to show them. Tap Add transaction, or turn on notification access.
At large text sizes or on a short screen the recovery message scrolls and its actions stack, so Reset filters and Search all history stay reachable.
Adding a transaction manually
Tap the + button above the bottom bar (outside the scrolling rows) to open the editor and fill in:
- Direction — Expense / Income (the segmented control leads).
- Amount — required. Enter it normally (e.g.
25.40); minor units are handled for you. - Currency — choose from the currencies you've enabled in Settings →
Supported currencies (your current transaction's currency is always
offered). Switching currency re-renders the amount (e.g. RM
12.34→ JPY1234). - Merchant — optional.
- Category & status — the always-visible row opens both pickers; the category list adapts to direction, and status defaults to settled (choose Pending / Failed / Reversed if needed).
- Date & time — when the transaction happened (date picker, then time picker).
- Note — optional free text.
- Location — optional. See transaction-detail.md for the location picker.
- Items — optional line items; Attachments — optional files. Both are explained in transaction-detail.md.
Tap Save when done.
From the Quick Settings tile
Pull down Quick Settings, tap the pencil to edit the panel and pin Add transaction. Tapping the tile opens this same form from anywhere — if the device is locked it asks you to unlock first, and the app lock still applies.
Deleting a transaction
- In the editor: scroll down and tap Delete, then confirm in the dialog.
- In the list: swipe left on a row, then confirm in the dialog.
Hidden items
Transactions with status Pending, Failed, or Reversed are stored but hidden by default — they never count as real spending. Hiding also removes an item from view without deleting it.
- Toggle Show hidden transactions in the filter sheet to show/hide hidden items.
- Hidden rows stay fully readable and carry a Hidden chip next to the category, so the state is visible and announced without relying on colour.
- Swipe right a visible row to hide it; swipe right a hidden row to unhide it. Screen readers can use the row's Hide/Unhide and Delete actions without swiping.
Delete vs hide
| Action | Result |
|---|---|
| Delete | Removes the transaction permanently (confirm dialog in both list and editor). |
| Hide | Keeps it, excludes it from views and totals until unhidden. |
Next
- Editing a transaction & attachments — fix details, split into items, attach files, add a receipt photo.